Each Chart On Its Own: A Review of BA
 By
Zac Mannes
By
Zac Mannes
We have often cautioned in StockWaves that more bearish moves in the market can hijack even the most bullish individual charts. But that does not mean one should abandon ship on everything bullish at the first break of key support levels in the market indices (not even sure we have seen that yet).
It is still prudent to evaluate "each chart on its own" -- and use the detailed parameters laid out in Wave Setups and key support levels shown or implied on charts.
While we were tracking potential in many things to attempt higher highs or more of a bounce, not many of those potentials were worthy of "Wave Setup" status. And as you can see of the Wave Setups posted since Feb about half have been shorts.
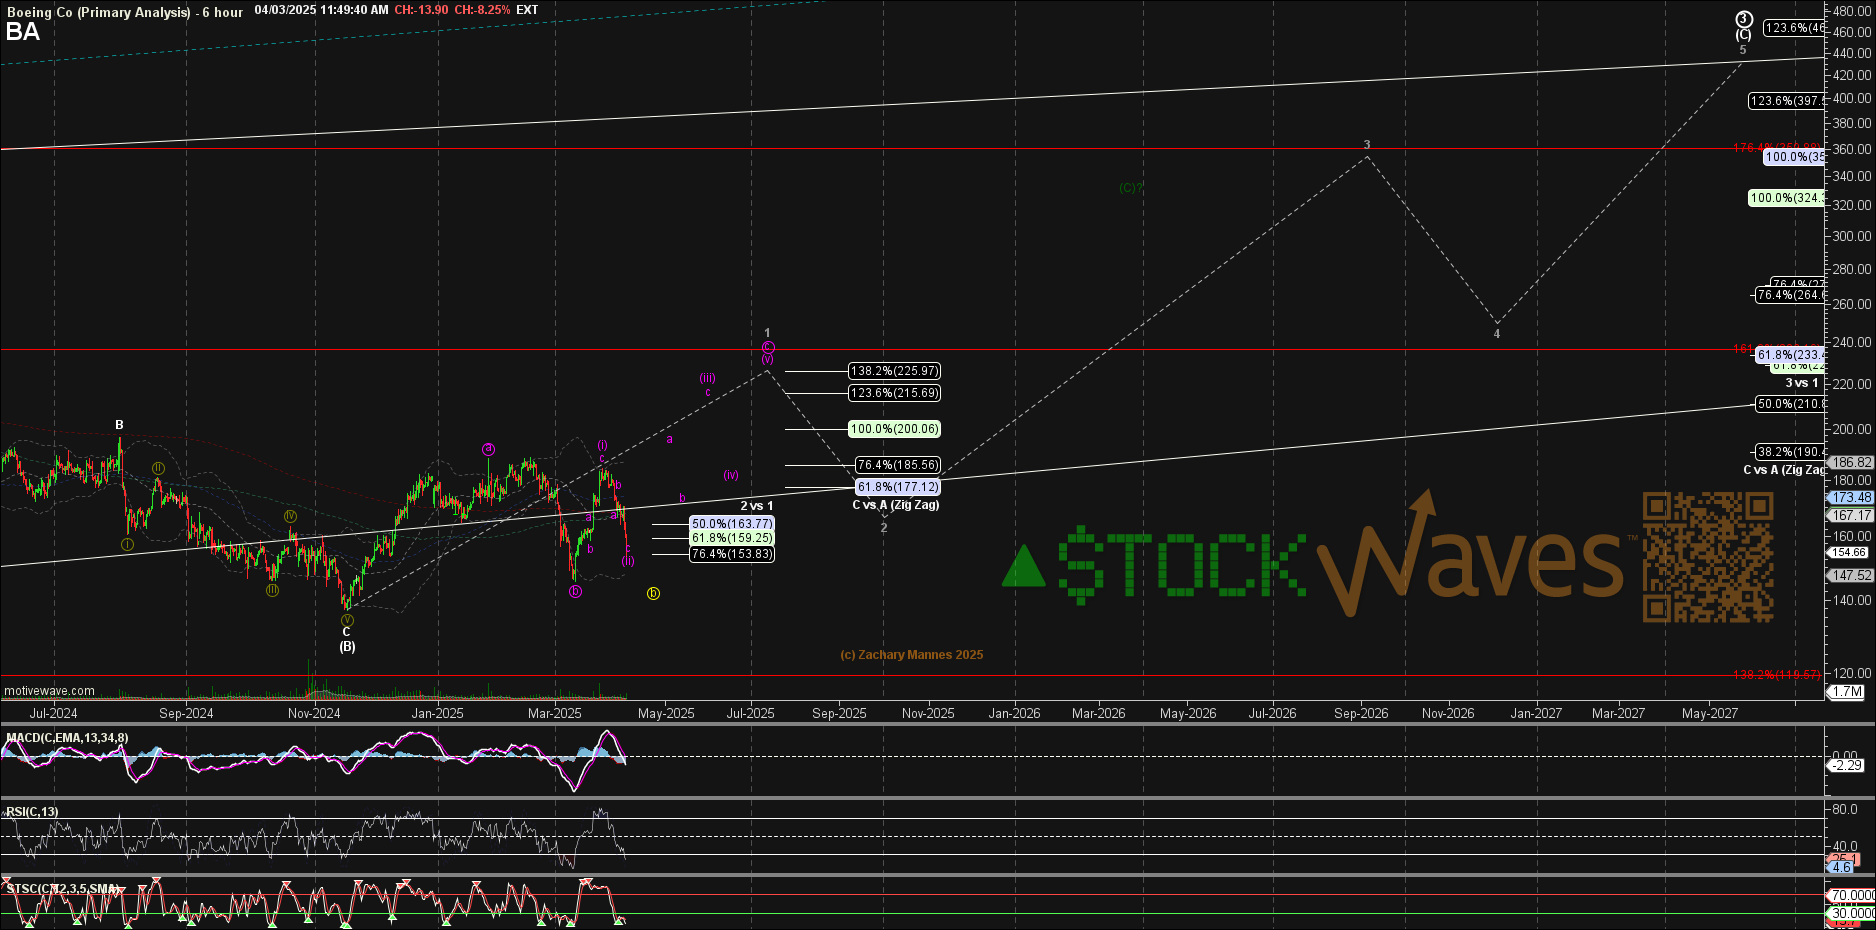
I want to talk a little about the Wave Setup on BA.
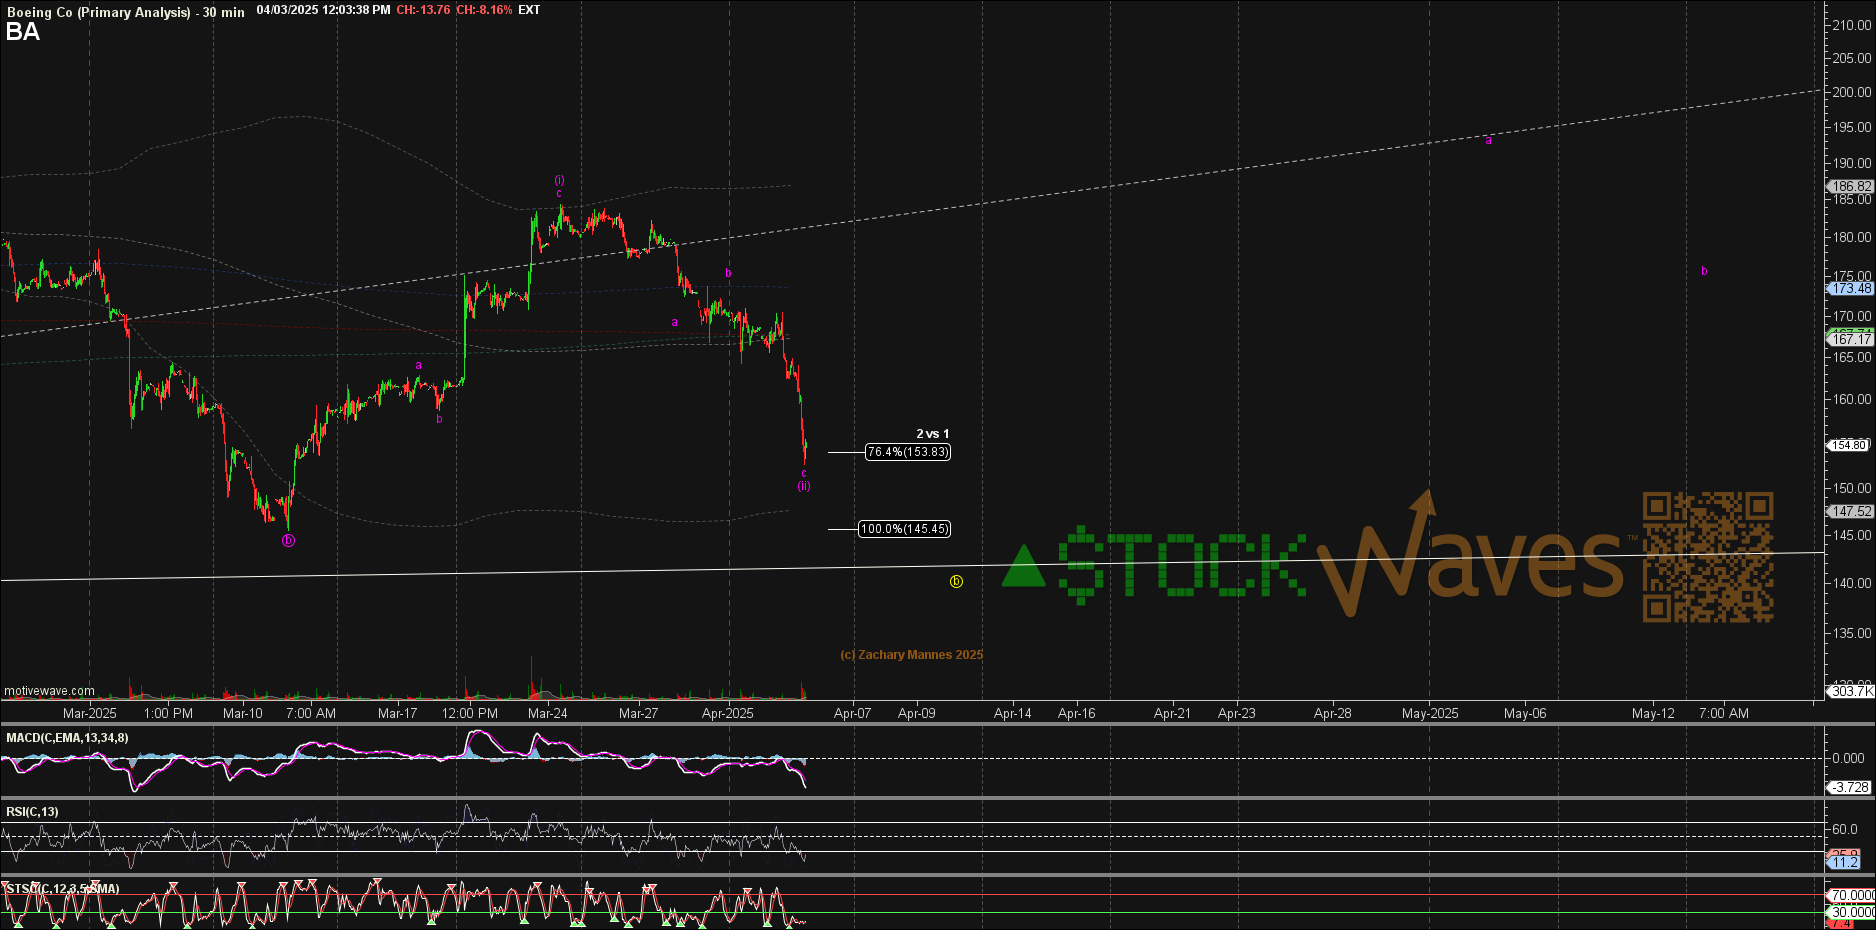
It was posted on 3/12 as we were turning up from the circle b-wave low: https://www.elliottwavetrader.net/trading-room/post/9564754
Initial resistance was set at 177. It hit that and on 3/25 triggered the alert for the first official update of that WS: https://www.elliottwavetrader.net/trading-room/post/9585216
While we heard a lot of chatter about some folks adding in that region for a "break out," we urged caution. While it was possible that the circle c of just our wave 1 of an ED for (C) was further along, the price structure as discussed just before and in the update argued for only an abc up as (i) of a smaller ED for the circle c allowing for a decent FADE as (ii).
Resistance levels are chosen for a reason.
That possible (ii) is now stretching the reliable limits. It could force a wider flat for the circle b. The broader market pressure could even force an invalidation to the start of our (C) wave.
But this achieved a gain of +16% from the time the WS was posted into the highs it was hitting above resistance at the time of the first update.